In the previous article, we implemented user registration and login with OAuth 2.0 bearer token authentication. Now, we are gonna document the API with OpenAPI 3 specification.
Introduction
The OpenAPI Specification (OAS) defines a standard, language-agnostic interface to HTTP APIs that allows both humans and computers to discover and understand the capabilities of the service without access to source code, documentation, or through network traffic inspection. When properly defined, a consumer can understand and interact with the remote service with a minimal amount of implementation logic.
An OpenAPI definition can then be used by documentation generation tools to display the API, code generation tools to generate servers and clients in various programming languages, testing tools, and many other use cases.
What you’ll do?
In a nutshell, we are going to perform the following steps for documenting the REST API that we developed earlier.
- Add OpenAPI 3.0 dependency
- Configure OpenAPI 3.0 with Basic and Bearer Security schemes. OpenAPI uses the term security scheme for authentication and authorization schemes.
- Modify Spring Security to permit the Swagger resource requests without authentication.
- Test with Swagger UI
What you’ll need?
- IntelliJ or any other IDE of your choice
- JDK 17
- MySQL Server 8
Documenting REST APIs
Adding OpenAPI 3 Dependency
pom.xml
springdoc-openapi java library helps to automate the generation of API documentation using spring boot projects. springdoc-openapi works by examining an application at runtime to infer API semantics based on Spring configurations, class structure, and various annotations.
		<dependency>
			<groupId>org.springdoc</groupId>
			<artifactId>springdoc-openapi-starter-webmvc-ui</artifactId>
			<version>2.0.2</version>
		</dependency>
Configuring OpenAPI
OpenApiConfig.java
OpenAPI can either be configured programmatically or with annotation-based configuration. I chose the latter since that looks neat and simple to me.
package com.javachinna.config;

import io.swagger.v3.oas.annotations.OpenAPIDefinition;
import io.swagger.v3.oas.annotations.enums.SecuritySchemeType;
import io.swagger.v3.oas.annotations.info.Contact;
import io.swagger.v3.oas.annotations.info.Info;
import io.swagger.v3.oas.annotations.security.SecurityRequirement;
import io.swagger.v3.oas.annotations.security.SecurityScheme;
import io.swagger.v3.oas.annotations.security.SecuritySchemes;
import org.springframework.context.annotation.Configuration;

@Configuration
@OpenAPIDefinition(info = @Info(title = "REST API", version = "1.1",
        contact = @Contact(name = "Chinna", email = "[email protected]")),
        security = {@SecurityRequirement(name = "basicAuth"), @SecurityRequirement(name = "bearerToken")}
)
@SecuritySchemes({
        @SecurityScheme(name = "basicAuth", type = SecuritySchemeType.HTTP, scheme = "basic"),
        @SecurityScheme(name = "bearerToken", type = SecuritySchemeType.HTTP, scheme = "bearer", bearerFormat = "JWT")
})
public class OpenApiConfig {
}
Note: We will not be using the basic authentication in this article since we have already disabled in the application. We will explore how we can make use of both basic and JWT authentication together in the next article.
Modifying Spring Security Config
WebConfig.java
When documenting with OpenAPI, there are 4 paths that we need to configure as public paths to allow them without authentication
/v3/api-docs.yaml-> This is the default path used to get the swagger definition in YAML format/v3/api-docs-> This is the default path used to get the swagger definition in JSON format/swagger-ui/**-> This is the default root path to Swagger UI which contains all the Swagger UI resources/swagger-ui.html-> This is the default path to Swagger UI itself where we can play with API
@Configuration
public class WebConfig {

    @Value("${jwt.public.key}")
    RSAPublicKey key;

    @Value("${jwt.private.key}")
    RSAPrivateKey privateKey;
    public static final String[] PUBLIC_PATHS = {"/api/auth/**",
            "/v3/api-docs.yaml",
            "/v3/api-docs/**",
            "/swagger-ui/**",
            "/swagger-ui.html"};
    @Bean
    public SecurityFilterChain securityFilterChain(HttpSecurity http) throws Exception {
        // @formatter:off
        http
                .authorizeHttpRequests()
                    .requestMatchers(PUBLIC_PATHS).permitAll()
                    .anyRequest().hasAuthority("SCOPE_ROLE_ADMIN").and()
                .csrf().disable()
                .httpBasic().disable()
                .oauth2ResourceServer(OAuth2ResourceServerConfigurer::jwt)
                .sessionManagement((session) -> session.sessionCreationPolicy(SessionCreationPolicy.STATELESS))
                .exceptionHandling((exceptions) -> exceptions
                        .authenticationEntryPoint(new BearerTokenAuthenticationEntryPoint())
                        .accessDeniedHandler(new BearerTokenAccessDeniedHandler())
                )
                // XSS protection
                .headers().xssProtection().and()
                .contentSecurityPolicy("script-src 'self'");
        // @formatter:on
        return http.build();
    }
Configuring Custom Path for Swagger Documentation (Optional)
By default,
- The Swagger UI page will be available at
http://server:port/context-path/swagger-ui.htmlorhttp://server:port/context-path/swagger-ui/index.html - The OpenAPI description will be available at the following URL in JSON format:
http://server:port/context-path/v3/api-docs- server: The server name or IP
- port: The server port
- context-path: The context path of the application
- Documentation can be available in yaml format as well, on the following path:
/v3/api-docs.yaml - For a custom path of the swagger documentation in HTML format and API definition, add the following
springdocproperties in your spring-boot configuration file
application.properties
# swagger-ui custom path
springdoc.swagger-ui.path=/docs/swagger-ui.html
# /api-docs endpoint custom path
springdoc.api-docs.path=/docs
We also need to make sure that the custom path is permitted without authentication in the Spring Security configuration.
WebConfig.java
public static final String[] PUBLIC_PATHS = {"/api/auth/**", "/docs/**"};
Accessing Swagger UI with Custom Path
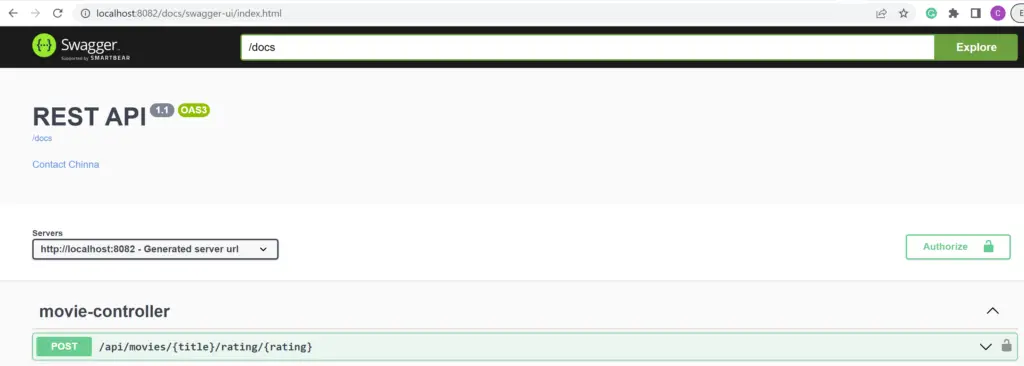
Accessing API Docs with Custom Path

Testing
Let’s stick to the default path for Swagger UI and API docs and go to http://localhost:8082/swagger-ui/index.html
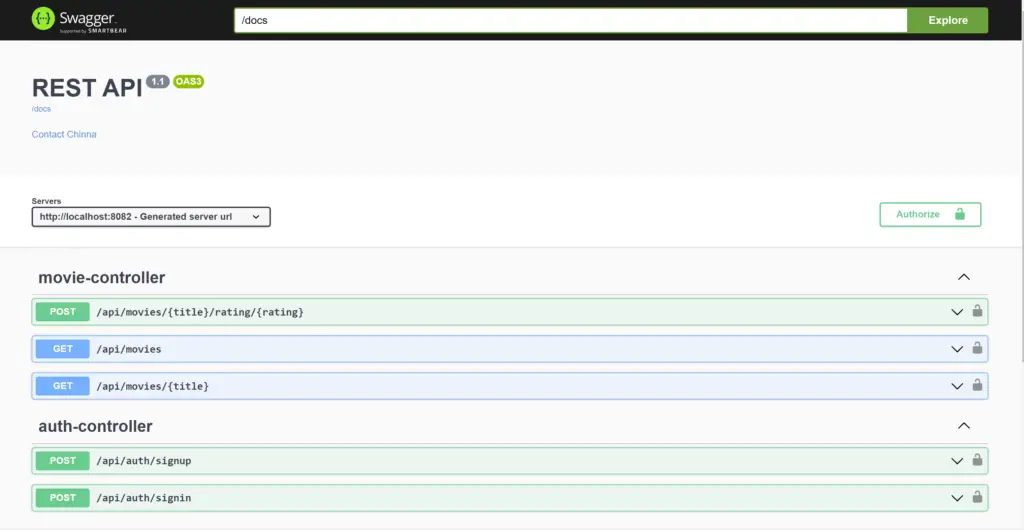
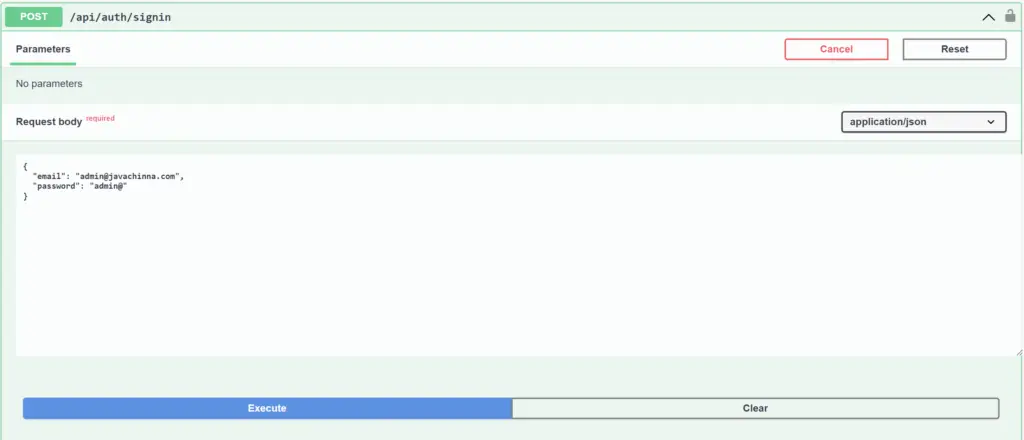
Access Token Request
Access Token Response
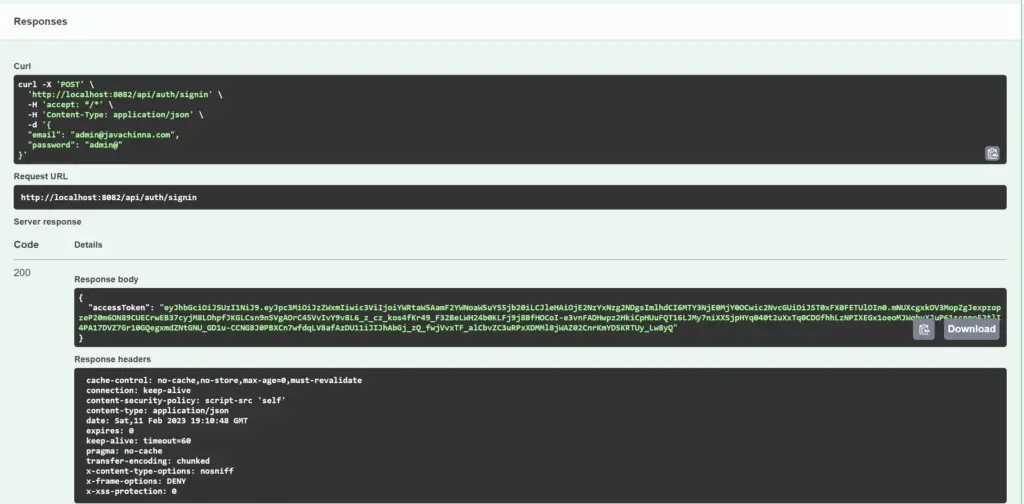
JWT Authentication
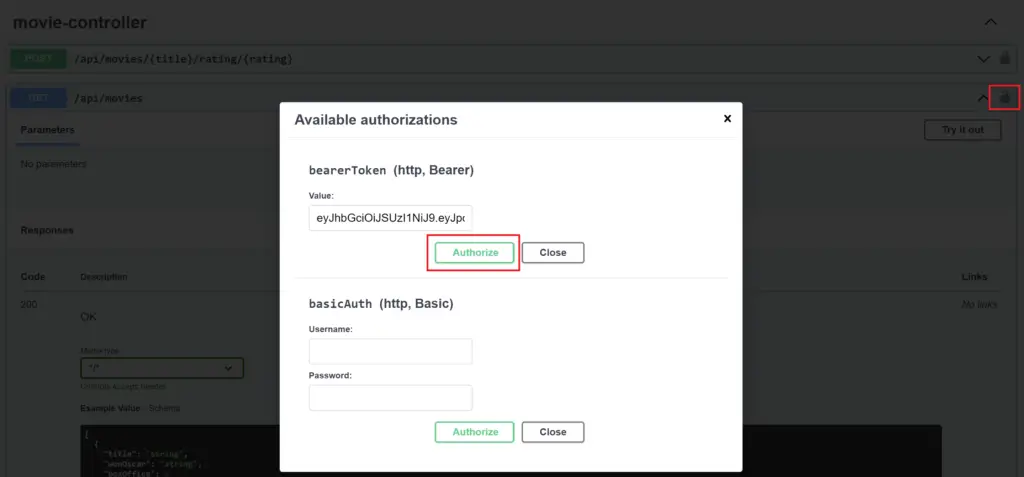
Click on the lock icon on the right side and enter the token in the bearer token field and click on Authorize to login
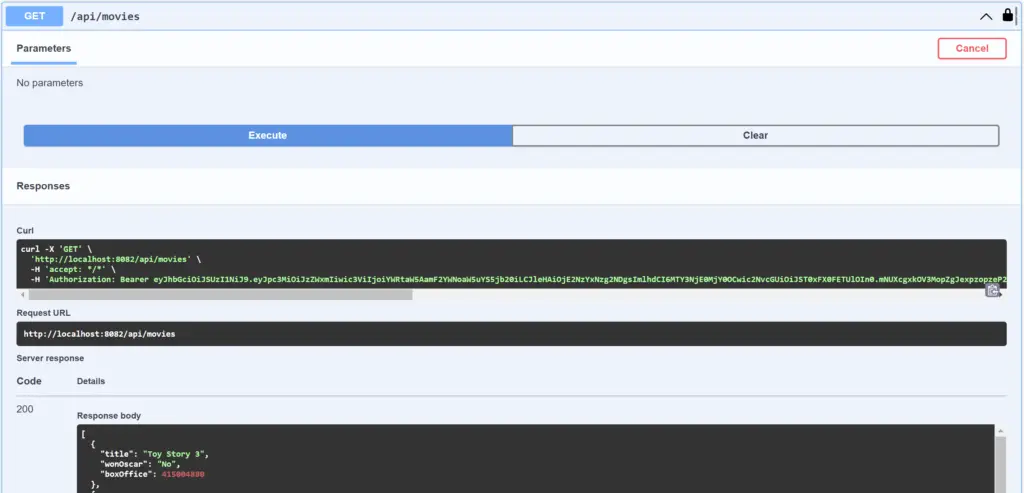
Secured API Request with Access Token
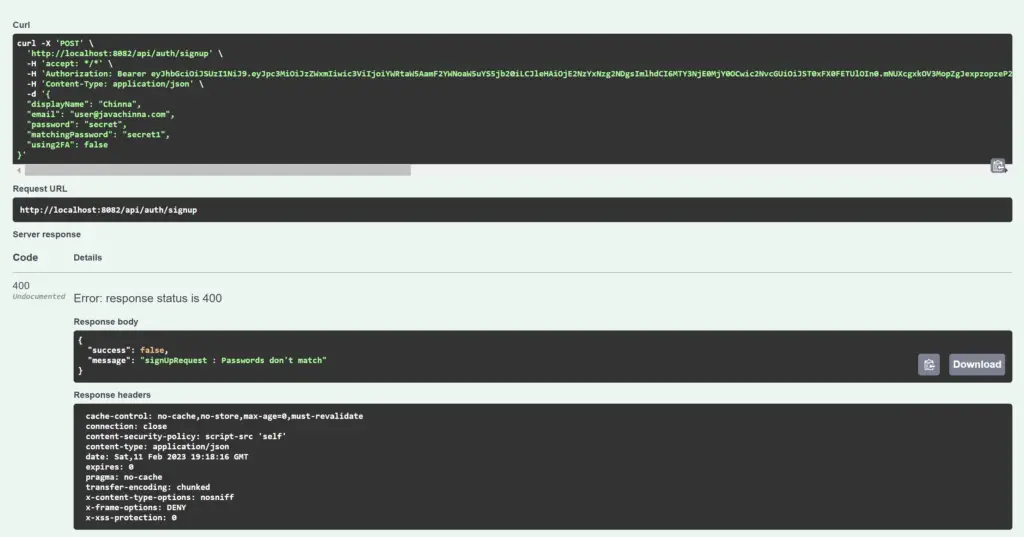
User Registration Bad Request and Response
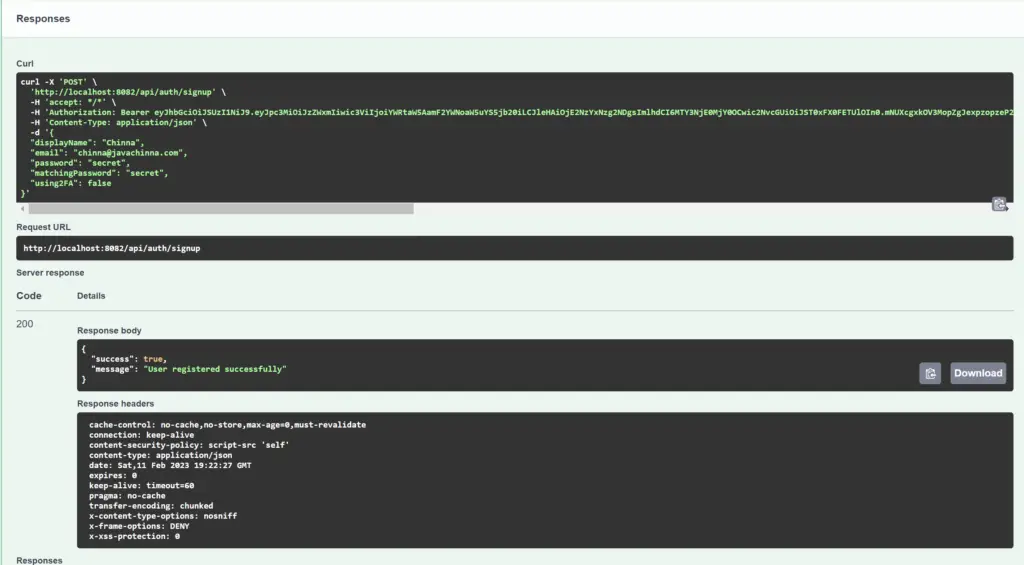
User Registration Request and Response
Source Code
https://github.com/JavaChinna/spring-boot-oauth2-jwt
What’s Next?
In this article, we have documented the REST APIs with OpenAPI spec. In the next article, we will explore how we can implement endpoint-specific authentication by configuring multiple httpsecurity in Spring Security.


